In this simple blog post, I’m going to explain how easy it is to expand/resize your CentOS Linux VM disk. By default, an Azure Linux VM comes with a 30 GB boot disk. In this step, we’re going to expand this disk to 64 GB.
Step 1 Shut down your Azure VM (or skip this step when you’re running on a physical server)
Before changing the disk size, the virtual machine must be powered off (or the disk must be de-attached)

Step 2 Increase the OS disk, go to the virtual machine. Select the disk and click on the OS disk. Now go to size and change the size of your disk.
Just follow these simple steps to change the disk size. Notice that how larger your disk size is the more IOPS (performance) you get when using Azure.


Step 3 Start your virtual machine or server
Okay, let’s boot up the server and log on using SSH or serial console (or bastion).

Step 4 Check size before the change
Notice my 30GB root filesystem (/) which is nearly full and the additional 50 GB disk which we’re going to add to the root volume.
df -h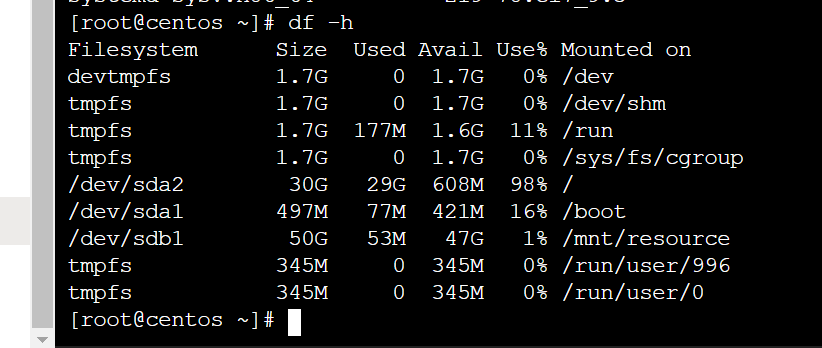
Step 5 Check partitions on disk
Use the following steps to assign the extra disk space to the root filesystem (/)
fdisk -l /dev/sda
fdisk /dev/sda
p (to proceed)
d (to delete the 2nd partition)
n (for new partition)
p (for primary partition)
w (to write the changes)
Step 6 Reboot your VM
reboot nowStep 7 Resize
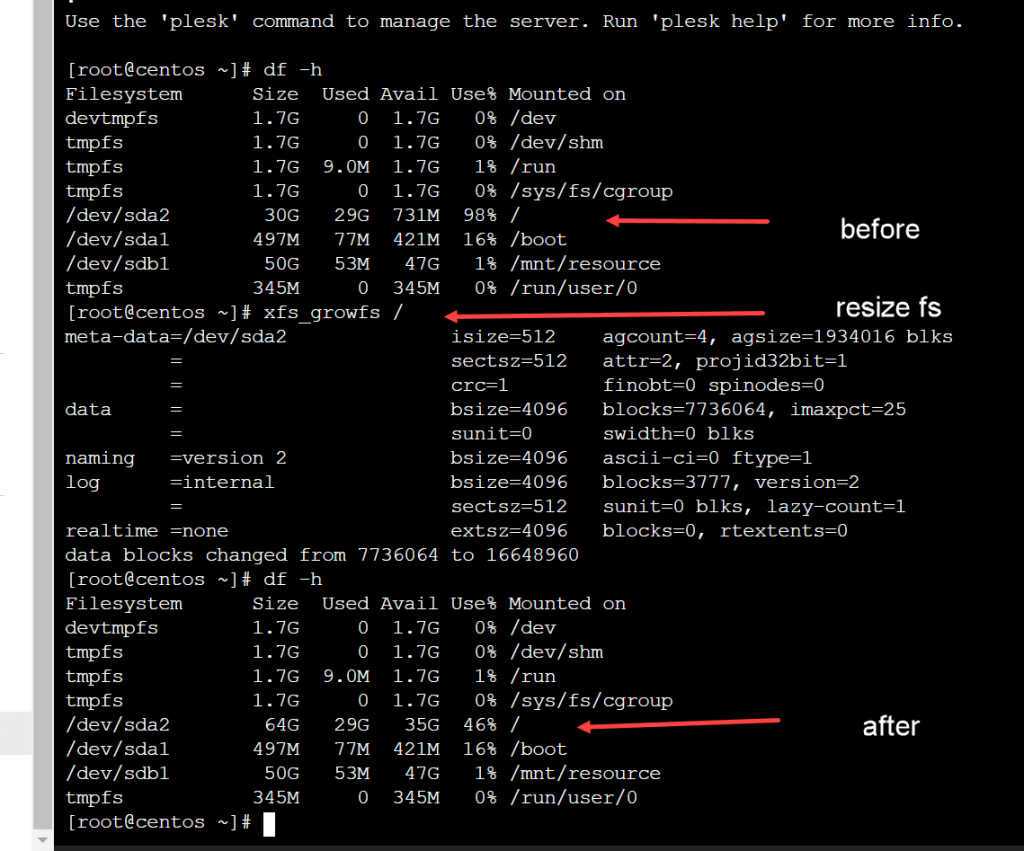
Use the following command to resize your file system :
xfs_growfs /df -hNow check if your server has the additional capacity :